Thursday, December 29, 2011

A Distant Blogger's Apology

Okay, so I've been neglecting my blog for the past month...and I'm terribly sorry. I haven't neglected baking but I have stopped photographing my work for a while. Simply because  I have had no time for such activity. But I'm here now, and hopefully you'll see more of me now that all the Christmas stuff is slowly ending.

Was your Christmas wonderful? Yes it was? Well that's just fantastic. How was mine you ask? Oh it was alright. Family, friends, food, Christmas lights, carols, and more food...you're right. It wasn't just alright, it was fabulous. Excellent. Magical even.

I think it would be safe to say that over 97% of the gifts my wonderful family and friends gave me were either cupcake or tea related. You guys know me so well! My family is just the best. THEEE best! No, don't try to tell me that yours is better....mine is the tops.

Well....I guess since I've bragged about my family, it's only fair to share some of the wonderfulness they blessed me with.


Hmm yes. This is exactly what you think it is. A cute little single cupcake stand. And what's that on it, you ask? Well THAT is a ginormous Hersey's Kiss.


Yes, these are Matryoshka Doll measuring spoons and cups. And yes, I did have to google how to spell that. But aren't they just the cutest things ever?


Life's short, eat cupcakes. Have another, they're small.
If you thought those dolls were adorable...these plates will probably blow you away! How sweet are they? I just love them. Sometimes I just sit and look at them because they're just so precious.


Alright, I saved the best for last. This is a cupcake. While, I guess it's a toque that looks like a cupcake. Yes, this too is adorable. Believe me now that my family is the best?


Okay so these are sugar cookie trees. I probably could've made an effort to upload these before Christmas....but I had better things to do. So here it is now!

Well well, that is all. So I hope you had the best Christmas ever! And I also hope you have a blessed new year! I probably won't be around until 2012...so see you next year!

Take care,
Sydney <3


Saturday, December 03, 2011

Meet Milk's Favorite Cookie's Twin

Alright, this post is written in dedication to all you lazy bakers out there. Sometimes I may classify as one of those....so it's not a bad thing. But today's recipe is super easy! Like, easier than all the other recipes I've said are easy. Yes, folks, it's true. Meet a three ingredient cookie!

Now, I don't want you to get the wrong impression of me....but I do have to admit to buying cake mix the other day. *GASP* I'm an awful person, I know. But let me explain. It wasn't because I was too lazy to make cake batter from scratch..No, no. It was for cookies. Therefore, I'm still a good person. Cake mix for cookies is 100% acceptable.

Cake Mix Cookies:
  • 1 box of cake mix (minus about 3 tablespoons)
  • 2  eggs
  • 1/3 cup oil
*Pre-heat oven to 350*
*Mix all (Yes, all three) ingredients together.
*Drop by spoonful on a cookie sheet, and bake for roughly 9 minutes
*Let cool on pan about 5 minutes before transferring to a cooling rack.

Mhmm, yup that's all. Hellooo easiest recipe EVER!
But...we can't just stop at the cookies because what fun would that be? We must take it one step forward and transform a simple cookie into a home-made Oreo cookie!

Now, I won't claim to know what the creamy part of an Oreo actually is...but I found a recipe that is pretty close. Unlike the cookies, it does take a good 20 minutes, but it's so worth it!

Martha Stewart's Hi-Hat Cupcake Icing
  • 1 3/4 cups sugar
  • 3 egg whites
  • 1/4 cup water
  • 1/4 teaspoon cream of tartar
  • 1 teaspoon vanilla extract
  • 1/2 teaspoon almond extract
*Beat the first four ingredients together in a heat-proof bowl for a few minutes, until fluffy...(until you begin to think "ITS SO FLUFFY I'M GONNA DIE!!")
*Place the bowl in a pot of simmering water (kinda like a double-boiler type set-up) and beat until stiff peaks form. This will take around 14 minutes or so...just be patient.
*Once frosting has reached 160*F on a candy thermometer, remove it from the pot of water and add both extracts.
*Continue to beat for an additional 2 minutes until the icing thickens


I just spread the icing with a spoon between two cookies, but I guess you could use a piping bag if you want to make a bigger mess :)

It's kind of obvious, but you can use whatever flavor of cake mix depending on what flavor of cookie you want. These ones are just vanilla, but I also did some chocolate ones. In my opinion, the vanilla were better..but that's just me.


Alright, you have no excuse to not try these since they are so super-duper easy. Go forth and B.A.KE!
Take care,
Sydney

Monday, November 21, 2011

T'is the Season of Baking

Christmas is just around the corner...and most of you know what that means. It's time to up the amount of baking going on in my house. Yes, indeed. What good is snow if you can't look at its beauty while sipping on some hot tea and nibbling at a yummy cookie? Exactly, no good at all. The snow is gorgeous! And I love all the Christmas lights going up...but more than all of that, I love standing in my kitchen looking out the window while smelling cookies baking in the oven.

And what kind of cookie is the most Christmasy? Well, a basic sugar cookie of course! The pure white dough and sweet vanilla smell is the definition of Christmas baking. Now, you could argue that something like meringues or peppernuts or shortbread or gingerbread is more Christmas-like, but for me it is a definite win for sugar cookies.

Call me boring, I don't care. Sugar cookies with Royal Icing are theee way to go. Not only at Christmas, but anytime of the year. So easy, yet so delicious at the same time! And the possibilities for decorating are just endless!! Endless, I tell you, with no end.

So to combine my two latest loves of life, colored sugar and cookies with writing. I present to you! My cookies decorated with writing and colored sugar! taadaa!

LIVE; LOVE; & LAUGH.
So the last cookies in this set got a bit messy...but that's alright. I'm still happy with it. Because what good would living and loving be without laughing? It would be pointless..so therefore, I have included the "laugh" cookie!


These ones were decorated by my friend Amber and exchange student, Brenda! It's so simple but it looks super awesome! Alls I did was outline the cookie, flood it with pour royal icing and then let it harden overnight. The next day, it was just like drawing on a piece of paper! I love my new Wilton Food Markers! I would highly suggest getting some, they're sweet!

FAITH; HOPE; & LOVE

And now these three remain: faith, hope and love. But the greatest of these is love.
                                               -1st Corinthians 13:13

LIVE; LOVE; & LAUGH
Well....that's all the pictures I got of these cookies. Apparently they're a hot commodity in my house! Haha, not complaining or anything, I do enjoy when peope enjoy my baking.

I hope you're all enjoying the snow and the frigid weather!
Happy Winter to you!
-Sydney <3

Friday, November 18, 2011

Peanut Butter meet Chocolate meet Cupcake

Reece`s Peanut butter cups are theee best food. No matter what anyone of you say to disagree. It`s not my opinion, it`s a fact. Peanut butter and chocolate are just magical. Something happened when peanut butter was invented and now the world is just a better place. And even better than that, when some genius put peanut butter and chocolate together....the world became magical, almost enchanted.

BUT! Just wait, there`s more. One step closer to pure enchantment. Cupcakes with peanut butter and chocolate! Yes, folks, I said that. Such a blessed thing really does exist.


Oh yes, and peanut brittle. A Peanut butter cupcake would just not be complete without peanut brittle. Well, truth be told...I hate peanut brittle. I think it`s gross and disgusting. But I do like how it looks!

So now that we are clear on just how magical these cupcakes are, here is the recipe!

Chocolate Peanut Butter Cupcakes!
  • 3 ounces chopped chocolate
  • 1/4 cup cream
  • 2/3 cup smooth peanut butter
  • 2/3 cup flour
  • 1/2 cup ground almonds
  • 3 tablespoons cocoa powder
  • 1 teaspoon baking powder
  • 1/8 teaspoon salt
  • 1/4 cup melted butter
  • 1 cup brown sugar
  • 2 eggs
*Pre-heat oven to 350F and line some cupcake tins
*Melt chocolate and cream in a double boiler (or a small pot inside a bigger pot filled with water) until smooth. Remove from heat and let cool
*Mix flour, almonds, cocoa, baking powder, and salt in a small bowl.
*Beat butter and sugar until creamy
*Add eggs one at a time.
*Beat in the chocolate mixture and dry ingredients.
*Divide into cupcake tins and bake for 20-25 minutes.

Peanut Brittle
*Well, there is a recipe for this but I didn`t follow it...But i shall explain what I did.
*In a small pot, melt white sugar (about 1/2 cup) until it browns. Make sure the heat is low so the sugar does not burn
*Add some peanuts, I used chopped but whole would work aswell. You don`t want to add too many or it will become t0o thick. But use enough so when you break it there will be peanuts in all the pieces
*Pour the caramalized mixutre onto a lined cookie sheet and let set for about 20 minutes or until hard
*Break into pieces and use to decorate cupcakes.


I just used a chocolate butter cream to ice my cupcakes, but you could use whatever you want.

And there you go, a small piece of magic...that you can create! So help make this world a better place: bake Chocolate Peanut Butter Cupcakes

Toodles,
Sydney

Monday, November 07, 2011

The Chocolate Chip Cookie; Remix

Remember when you were a kid and chocolate chip cookies were the best food ever? ....Well maybe that wasn't just when you were a kid. But my point is: Chocolate Chip Cookies are irreplaceable.

And just because I find it totally necessary, I will share some awesome baby pictures of my sister and I.
Chelsea's 1st Birthday
My 2nd Birthday
How cute, right? Well the point was not to show-off how we were as kids, but more to demonstrate that chocolate chip cookies are all the rage, even 17 years ago.


My mom is clearly a professional giant chocolate chip cookie maker, and me..well I'm just an amateur. But nonetheless....I am extremely pleased with my very first cookie pizza. This idea came from the Pillsbury website:  the Jingle Bell Cookie Pizza.

But don't be fooled! I may be an amateur cookie pizza maker...but I'm not new enough to fall for their advertising ploy. Who pays money for pre-made cookie dough? Okay, wait. I admit to doing it a few times....when I really just want to eat the dough and not make cookies. But that's a whole different story not for this post.

BUT! I'm getting distracted. Sorry. This pizza was so simple to make and apparently tasted really good! I, however missed a chance to eat any of it. In hindsight I should have cut a piece for myself before giving it away.... darn it.


Taadaa! It was so easy, I made it into a four-step recipe...It's like a picture book, except not really. But kind of, in a way. AnyWHO, I'm getting distracted again.

So basically, you make a regular chocolate chip cookie recipe and spread the dough on a pizza pan (1), leaving an inch or so around the edges for expansion. After it's fully baked, about 20ish minutes, sprinkle the top with mini marshmellows and smarties(2). Put it back in the oven for a minute or two until the marshmellows start to puff up(3). Finally, drizzle with chocolate (or caramel) sauce(4). Now the key thing is to let it cool off before trying to move it...unless you want a disaster in your kitchen. So let it sit on the pan for atleast on hour before transfering it to a serving dish.

See? Super easy...and yummy!

Good bye, chocolate chip cookie lovers <3
Sydney

Thursday, November 03, 2011

Sweet & Salty? Chocolate & Bacon!

Bacon: n - meat from the back and sides of a pig, dried, salted, and usually smoked.

Chocolate: n - a preparation of the seeds of cacao, roasted, husked, and ground, often sweetened and flavored, as with vanilla.

Cupcake: n - a small cake, the size of an individual portion, baked in a cup-shaped mold.

Alright, now imagine all three of the aforementioned words combined into one. Bacon Chocolate Cupcakes. Yes, you read that correctly. Bacon in a cupcake. Unbelievable, right?


Now they may appear to be regular chocolate cupcakes but they most definitely are not! Inside are small, minuscule bits of bacon coated in pure milk chocolate. It sounds a bit gross, I know. I was a sceptic at first, but it's unfair to judge a cupcake by it's name. You must try these before you frown at the sound of it. Do it (In a voice from Starsky and Hutch). I promise you won't regret it.


I'm pretty sure you still don't believe me that this is a good combination, but I shall share the recipe anyways. With hope that at least one brave person will try it out.

Chocolate Bacon Cupcakes:
          12 slices of bacon
          1 cup unsalted butter
          1/2 cup cocoa powder
          3/4 cups water
          2 cups sugar
          2 Eggs
          1/2 cup buttermilk
          2 tablespoons Vanilla
          2 cups flour
          1/2 teaspoon baking soda
          1 teaspoon baking powder
          1/4 teaspoon salt
          1 cup chocolate chips

*Fry the bacon...as you would normally fry bacon
*Let the bacon cool down and cut it into tiny bit-sized pieces
*Melt the chocolate (microwave or on the stove, whatever suits you), once it's melted add the bacon bits to the chocolate and mix until combined.
*Spread the chocolate bacon mixture onto a wax paper-covered cookie sheet and place in the freezer.

*pre-Heat your oven to 350F
*Melt butter in a pot over low heat, whisk in cocoa powder and add water
*In a bowl, mix the sugar, eggs, buttermilk, and vanilla together
* Pour in the cocoa mixture, stirring until smooth
*Remove the cookie sheet from the freezer and break the chocolate into small pieces, adding half to the batter
*Bake for 20-ish minutes, until fully baked

Chocolate Frosting
          1/2 cup unsalted butter
          2/3 cups cocoa powder
          3 cups icing sugar
          1/3 cups milk
          1 teaspoon vanilla

*Melt butter in pot over low heat, stir in the cocoa,. Remove from heat
*Alternate between adding the icing sugar and milk
*Add the vanilla, and if you want a thinner consistency add more milk

*Spread or pipe onto cupcakes and sprinkle with the left-over bacon chocolate chips.


And there you have it! A bizarre, yet delicious cupcake that will surprise your guests....in a most satisfying way :)

Still not convinced? Make it. Right now. Do it.

Well, that is all I have for you tonight.
Take care y'all,
Sydney <3

Tuesday, October 25, 2011

Waffle:To bake something in the Shape of a Waffle

First and far most, I'd like to share a link to a fantastic website. Waffleizer; a place where all things look like waffles. Oh what a wonderful world!

But, besides being a super sweet website, it's a place to find excellent recipes. Such as Waffled Chocolate Chip Cookies. Yes, you heard that correctly: Waffled Chocolate Chip Cookies. A chocolate chip cookie shaped like a waffle....made in a waffle iron.

And it really is that simple! It takes about 2 minutes (depending on your waffle iron) to make each batch of cookies. And besides looking awesome, they taste delicious too!


Waffleizer gives a decent recipe for this, but I imagine it would work with any chocolate chip recipe. Although, the oats seem to play a large part in the texture of the cookie; so I would stick to a chocolate chip oatmeal recipe. Or just use the one on Waffleizer's website.

Please don't mind the lack of pictures.....I had the best intentions to take pictures of the process of making these, but once I started making them I forgot my plan. Oops, maybe next time!

Well School is calling my name once again,
So have a great afternoon,
Sydney :)

Friday, October 14, 2011

Cinnamon Bun Cupcakes!

What's better than a sticky, sweet mess in the shape of a roll? How about a sticky, sweet mess in the shape of a cupcake?

Being fall, I decided it was time to start with some winter-type baking. And the first thing that came to mind was cinnamon buns....but everybody makes cinnamon buns, they're nothing special (However, they're still delicious) So for a potluck lunch I recently attended, I gave the basic cinnamon bun a slight twist. And it was quite  a hit. A new name for this creation is still up in the air. The debate is between "cinnafins" (a cinnamon bun muffin) and "cinnacups" (obviously a cinnamon bun cupcake). But besides not having an official name, this dessert is pretty simple and very tasty.


Now I'm not sure but I have reason to believe you could use any cinnamon bun recipe and just put each bun in a cupcake liner to achieve this dessert, but nonetheless, I shall share the recipe that I used.

 Cinnamon Buns:
2 cups milk
1 tablespoon active dry yeast
1/3 cup sugar
2 teaspoons salt
6 1/2 cups flour
2 eggs
1/4 melted butter

Filling:
1/2 cup melted butter
1 cup sugar
1 cup brown sugar
3 tablespoons cinnamon
2 cups finely chopped apples

*In  small saucepan, warm milk to 110 F, Pour milk into a large bowl and dissolve in yeast and sugar.
*Add salt and 2 cups of flour, beat for two minutes.
*Beat in eggs and butter, stir in remaining flour.
**I wasn't able to mix in all the flour without kneading it by hand on the counter.**
*After kneading for about 5 minutes, Put dough back in bowl, cover with a towel and let sit for 40 minutes (I may have been impatient and only let it sit for 25 minutes....)
**Now would be the time to make the filling: mix sugar, brown sugar, cinnamon, butter, and apples in a small bowl.**

*Roll dough into a large rectangle and brush with butter. Sprinkle filling over top.
*Roll the dough into a log and cut into equal pieces about one inch thick.
*Place the pieces in a lined cupcake pan; cover and let sit for another 40 minutes (25 seems to work here too).
*Heat the oven to 350 F. Before putting the pans in the oven, brush butter over the tops of the cupcakes.
*Bake for 20 minutes.
 Apple Glaze:
1 cup powdered sugar
2 tablespoons & 1 teaspoon apple juice
*mix together and drizzle over cupcakes once baked.

Yum, yum, yum! They were amazing! Hope you're enjoying the chilly fall weather by baking up a storm :)

Take care,
Sydney <3

Thursday, October 06, 2011

Snicker-My-Doodle

You know it's totally necessary to make a cookie when the name makes you laugh.  Snickerdoodle. How can you read that and not smile even a little bit? Now the belief is that "Snickerdoodle" is from the German word Schneckennudeln (which oddly translates to "snail noodles") And after reading that the cookie now sounds less appealing, but nonetheless,  I made them anyways.


And I'm very happy I did! I'm not very good at explaining how things taste, but I think I nailed it with these cookies: Heaven rolled in cinnamon. Yup, that's pretty dead on.

And because these were just so darn amazing, I shall share the recipe with you! :)

Snickerdoodles
  • 1 cup softened butter
  • 1 1/2 cups sugar
  • 1 teaspoon baking soda
  • 1 teaspoon cream of tartar
  • 1/4 teaspoon salt
  • 2 eggs
  • 1 teaspoon vanillla extract
  • 3 cups flour
  • 1/4 cup sugar
  • 2 teaspoons cinnamon powder
*Pre-heat oven to 375
*Beat butter on high for 30 seconds. Add  the first measurement of sugar, baking soda, cream of tartar, and salt: beat until combined.
*Beat in eggs and vanilla
*Beat in as much of the flour as possible, stirring in the rest by hand.
**Now here it says to chill for one hour....but I'm impatient and did not do it and they turned out amazingly.**

*combine the cinnamon and sugar in a small bowl. After scooping dough into 1/4" balls, roll them in the mixture and place on cookie sheet.

*Bake for 10-12 minutes, let cool on sheet for a few minutes after removing from oven and then transfer to a cooling rack.


Are they not the cutest things ever? Yes, yes they are.

Now I'm not sure if you are aware of this, but October is National Cookie Month! Which means I feel the need to bake lots of cookies....honestly though I always feel that way. Now I just have a reason. So do us all a favor and get up off that couch your sitting on and please, go bake some cookies :)

Have a fantastic evening,
Sydney

Ps. That "snowball of posts" I promised you last week? well....my computer decided to go dead on me but it has been replaced with a new one, so I PROMISE they will come now!

*I got this recipe from the "Christmas Cookies 2011" Magazine. Buy it. It's awesome!

Wednesday, September 28, 2011

False Black Forest Cake..THE WHITE FOREST!

I have let myself fall behind with my blogging. Shame, Sydney, shame on you. So be ready for a snowball of posts over the next few days!

One thing you should know about me is that I love short cuts. Not cheating, just faster ways of doing necessary tasks. One of those tasks being leaving the kitchen to walk to the grocery store to buy an ingredient I thought I had but actually didn't.
Some may think of it as lazy, but I prefer the term innovative. Using whatever I find lying in the fridge or pantry I can usually come up with a make-shift ingredient to make my recipe work!
My example from last week being Black Forest Cupcakes. I had the cupcakes all made and hollowed out for the filling when I realized that I had no cherries.....dundundun! No fears, I found some mixed berry jam in the fridge and decided that would be close enough to cherries for that particular recipe.


Taadaa! Filled the cupcakes with Jam! And they didn't really taste like Black Forest...but they were pretty close. So I have decided to create my own cake flavour: WHITE FOREST! haha, I think that may be copyrighted...but oh well!


Yum, right? Yes, very much so! I enjoyed  them quite a bit.
So if you're ever in a pinch, I give you full permission to use my idea of White Forest Cupcakes. And I promise not to sue you for stealing my idea. :)

Have a great evening,
Sydney

Saturday, September 24, 2011

By "tomorrow" I actually meant almost a week later...

I cannot believe I forgot to post my chocolate cake recipe! I got so super busy this past week that it totally slipped my mind.
But no worries, here it is now, as good as ever :)

Quick-Mix Chocolate Cake
  • 1 1/2 cups white flour
  • 1 cup white sugar
  • 1/4 cup cocoa powder
  • 1 teaspoon baking soda
  • 1 teaspoon baking powder
  • 1/4 teaspoon salt
  • 1 teaspoon vanilla
  • 1 cup water
  • 1/3 cup oil
  • 1/4 cup vinegar
*Pre-heat oven to 350°F
*Throw everything in one big bowl and mix with an electric mixer on high until all the little lumps are gone.
*Pour in an 8x8" pan or into a lined cupcake pan.
*Bake for 25 minutes(cake) or 19 minutes for cupcakes.

Taadaa! There you have it....the most delicious and crazy easy chocolate cake recipe you will ever find!
Credit goes to my great grandmother for this recipe!

Don't know what to do this weekend? Why not bake me a cake? :)
Juuuust kidding.....or maybe not!
Adios!

Sydney

Tuesday, September 20, 2011

For all you Musicians out there

LaaaLaaaaaaaaLAAAAAAAA!
Yup, that's about all the musical talent I have. It's quite sad actually but I'm pretty sure my musical talent is decreasing as I get older. Not that I was ever the next Beethoven or Mozart...but I was decent on the piano and the trumpet. And now....well, I just stay away from all things musical!
.....With the exception of cupcakes of course. :)


Now just for the record, I think I spent more time googling what each instrument looks like than I did actually making them! I am 100% "type A" personality!

I just used marshmallow fondant....and colored it accordingly. Oh, well we're on this topic I shall ask for some advice! I used black Wilton gel color for the black and it ended up tasting really gross. I had to use a fair amount in order to actually make the fondant black not gray...Any suggestions for achieving a black without getting the food coloring taste?


At least there were only small amounts of the black so they cupcakes still tasted good!
Well.....that's all the time I have for today, folks. I shall now go drink tea and sit in my hot tub!
Happy Rainy Day to You!
-Sydney <3

Ps. Tomorrow I'll post my recipe for no-fail Chocolate Cake! :)


Monday, September 12, 2011

A swirl here; a swoosh there

There's nothing I love more than making cakes for family events. So this past Saturday when it was my parent's 23rd wedding anniversary I was more than happy to make a cake for the celebration!

My mom is a crazy chocoholic, so what would she like more than chocolate cake? Absolutely nothing. My dad on the other hand, eats anything you put in front of him. But I think I found a perfect combination for them with a Black Forest Cake.


So my photography skills may be lacking, but besides that I think it looks pretty good! I will admit to being very impatient when it comes to cake decorating. When I read to put the cake in the fridge for an hour I usually do it for twenty minutes...but I'm learning to follow instructions! I really am!

Also, a word of advice for crumb coating cakes: FREEZER! After you take the cake out of the pan, pop it in the freezer for fifteen-ish minutes and BAM! Your cake is a dream to ice!

Chocolate Chip borders are faaar easier than piping borders!

As far as piping the cake, I used my Wilton #2, 3, and 4 tips for different line thicknesses. I stuck with a basic buttercream because I love piping with buttercream, if you wanted lines with sharper edges I would suggest Royal Icing though.


Oh, and this cake carrier that is pictured above (well that's actually just the lid for it, but anyways...) is my favorite for displaying cakes! It's from Wal-Mart and it was like $16...you should go buy one because it's super awesome! Plus it also doubles as a punch bowl...nifty, right?

Well, have a splendid week and I shall be back soon :)
Sydney

Tuesday, September 06, 2011

Can I have s'more please?

If you're looking for the easiest cupcake frosting, this will be the last place you need to look.

I was on my way to a friend's house for a fire yesterday and I decided it would only be appropriate to bring cupcakes (a very common decision for me!). But what kind of cupcakes do you bring to a fire? One word: MARSHMALLOWS!

This is soooo simple. You could have absolutely zero baking talent and make these look amazing! Plus, they take about six minutes to decorate!

  1. Make any kind of cupcake you want. (I went with Chocolate because chocolate and marshmallow sounded like a good combination to me!)
  2. Bake the cupcakes for a minute or so less than you would normally (to avoid over-baking later on)
  3. Remove the pan from the oven and place a marshmallow on top of each cupcake.
  4. Put them bake in the oven for 3-4 minutes, until the marshmallows start to look soft.
  5. Take the cupcakes out of the oven again, this time pushing the marshmallow down to cover the top of the cupcake.
And there you have it! The easiest cupcake frosting I've ever made! If you want to add a more "firey" feel to the marshmallow frosting, broil them in the oven for a minute or so, until the tops look golden brown.

I, for one, don't like s'mores. But top a chocolate cupcake with a golden brown marshmallow and this girl is happy! I imagine these would taste delicious made with a graham wafer crust and topped with some shaved chocolate


The perfect cupcakes to munch on while sitting around a fire :)

My variation of  a snowman: the Cupcake Man :)

Happy Back to School, Everyone!
Sydney

Sunday, September 04, 2011

❀ Flower Power ❀

Summer is coming to an end...and that means the flowers are starting to die and the plants are no longer green. Now I won't pretend to enjoy gardening, but I do enjoy looking at all the different flowers in the garden. So in one last attempt to keep summer around for a bit longer, I decided to make some flower cupcakes.

I'm not the best at Royal Icing Flowers but I gave it my all, and I think they came out decently.


I love how the luster dust looks! I tried for so long to find some and I finally did! If you're looking, I got mine at Michael's in Winnipeg.

We also made some changes in our household yesterday! We picked up Brenda from the airport and she'll be living with us for the next ten months! :)

Apparently I can't make it the size I want, so sorry if you can't read them!
Taadaa! Welcome here, Brenda!
It's off to work for me later today. And hopefully some more summer cupcakes tomorrow!
Take care,
Sydney

PS. Follow my blog? Why not like my page on Facebook?

Wednesday, August 31, 2011

Icing + Cookie Dough = Amazing!

Hello again!
I'm starting to figure out this blog site,  but not completely. I'm currently attempting to make my page more to my liking with my own images, but that's not going too well! Hopefully I'll get it soon.
After a bit of stress over this design attempt, I settled into the kitchen for an evening of cupcake making, chai tea drinking, and French music listening (my 3 favorite things in life right now).

If you haven't, I would suggest checking out this blog. It is totally amazing! Her work is unbelievable! And the recipes she has are to die for!
Recently I stumbled across her recipe for Cookie dough Buttercream!!! Being an avid cookie dough lover, I had to try it! And it did not disappoint!
I paired this buttercream with a basic brown sugar cupcake, but it would be delicious with any cake recipe.

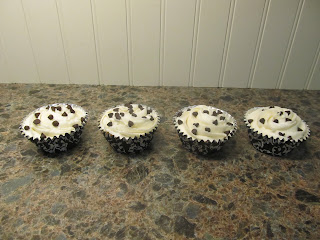
Cookie Dough Buttercream:
  • 1 1/2 cups  butter
  • 1/2 cup vegetable shortening
  • 8 cups icing sugar (1 kg)
  • 1/2 cup milk
  • 1/2 cup flour
  • 1/4 cup brown sugar
  • 1/2 teaspoon vanilla
  • 1/8 teaspoon salt
  • mini chocolate chips
  1.  Blend butter and shortening together. Add icing sugar and milk until fully incorporated. (If you stop here, you can use this recipe as a simple buttercream icing)
  2.  Mix flour and brown sugar in a separate bowl. Add flour/sugar mix to vanilla buttercream base.
  3. Add in the vanilla and salt. Blend until smooth.
 And there you have it! An amazing tasting and super simple buttercream for any occasion! It is a bit sweet, but that's part of why I like it :) So feel free to experiment around with the sugar amounts to suit your taste buds!
Happy Wednesday,
Sydney

Monday, August 29, 2011

Hello Blogging World

Well, here goes: my first blog. I guess I'll start off by telling you a bit about myself.
I'm 16 years old, I have one older sister. I was born in Saskatchewan, after living in 8 different places, I now live in Morden, Manitoba and I love it here!
I LOVE baking. It's my passion in life. I don't bake for the money or to try to impress people. I bake because I love seeing how something I've created can put a huge smile on someone elses face. It makes me truly proud to have been blessed with the gift of baking and decorating sweets.
I'm far from a professional baker so don't be expecting outstanding work from me. I'm still learning tips and tricks to make perfect cakes, cupcakes, and cookies. In fact, I've only been big into this whole baking thing for about a year so any advice you have is gladly accepted.
I will try to figure out the how-to's of blogging as quick as I can, but for now it might be a bit rough here.
I plan to build this into a baking blog (as if you couldn't tell by what I've said about baking) with recipes, pictures, and links to some of my favorite work. But until I figure this out it might just be some random thoughts from yours truly :)
Okay, well that's about it for blog #1...
Good night, World,
Sydney